No version for distro humble. Known supported distros are highlighted in the buttons above.
No version for distro jazzy. Known supported distros are highlighted in the buttons above.
No version for distro rolling. Known supported distros are highlighted in the buttons above.
No version for distro noetic. Known supported distros are highlighted in the buttons above.
No version for distro ardent. Known supported distros are highlighted in the buttons above.
No version for distro bouncy. Known supported distros are highlighted in the buttons above.
No version for distro crystal. Known supported distros are highlighted in the buttons above.
No version for distro eloquent. Known supported distros are highlighted in the buttons above.
No version for distro dashing. Known supported distros are highlighted in the buttons above.
No version for distro galactic. Known supported distros are highlighted in the buttons above.
No version for distro foxy. Known supported distros are highlighted in the buttons above.
No version for distro iron. Known supported distros are highlighted in the buttons above.
No version for distro lunar. Known supported distros are highlighted in the buttons above.
No version for distro jade. Known supported distros are highlighted in the buttons above.
Repository Summary
| Description | Remote monitoring package for navigation |
| Checkout URI | https://github.com/CIR-KIT/remote_monitor.git |
| VCS Type | git |
| VCS Version | indigo-devel |
| Last Updated | 2016-12-23 |
| Dev Status | MAINTAINED |
| CI status | No Continuous Integration |
| Released | UNRELEASED |
| Tags | No category tags. |
| Contributing |
Help Wanted (0)
Good First Issues (0) Pull Requests to Review (0) |
Packages
| Name | Version |
|---|---|
| remote_monitor | 0.1.0 |
README
remote_monitor 

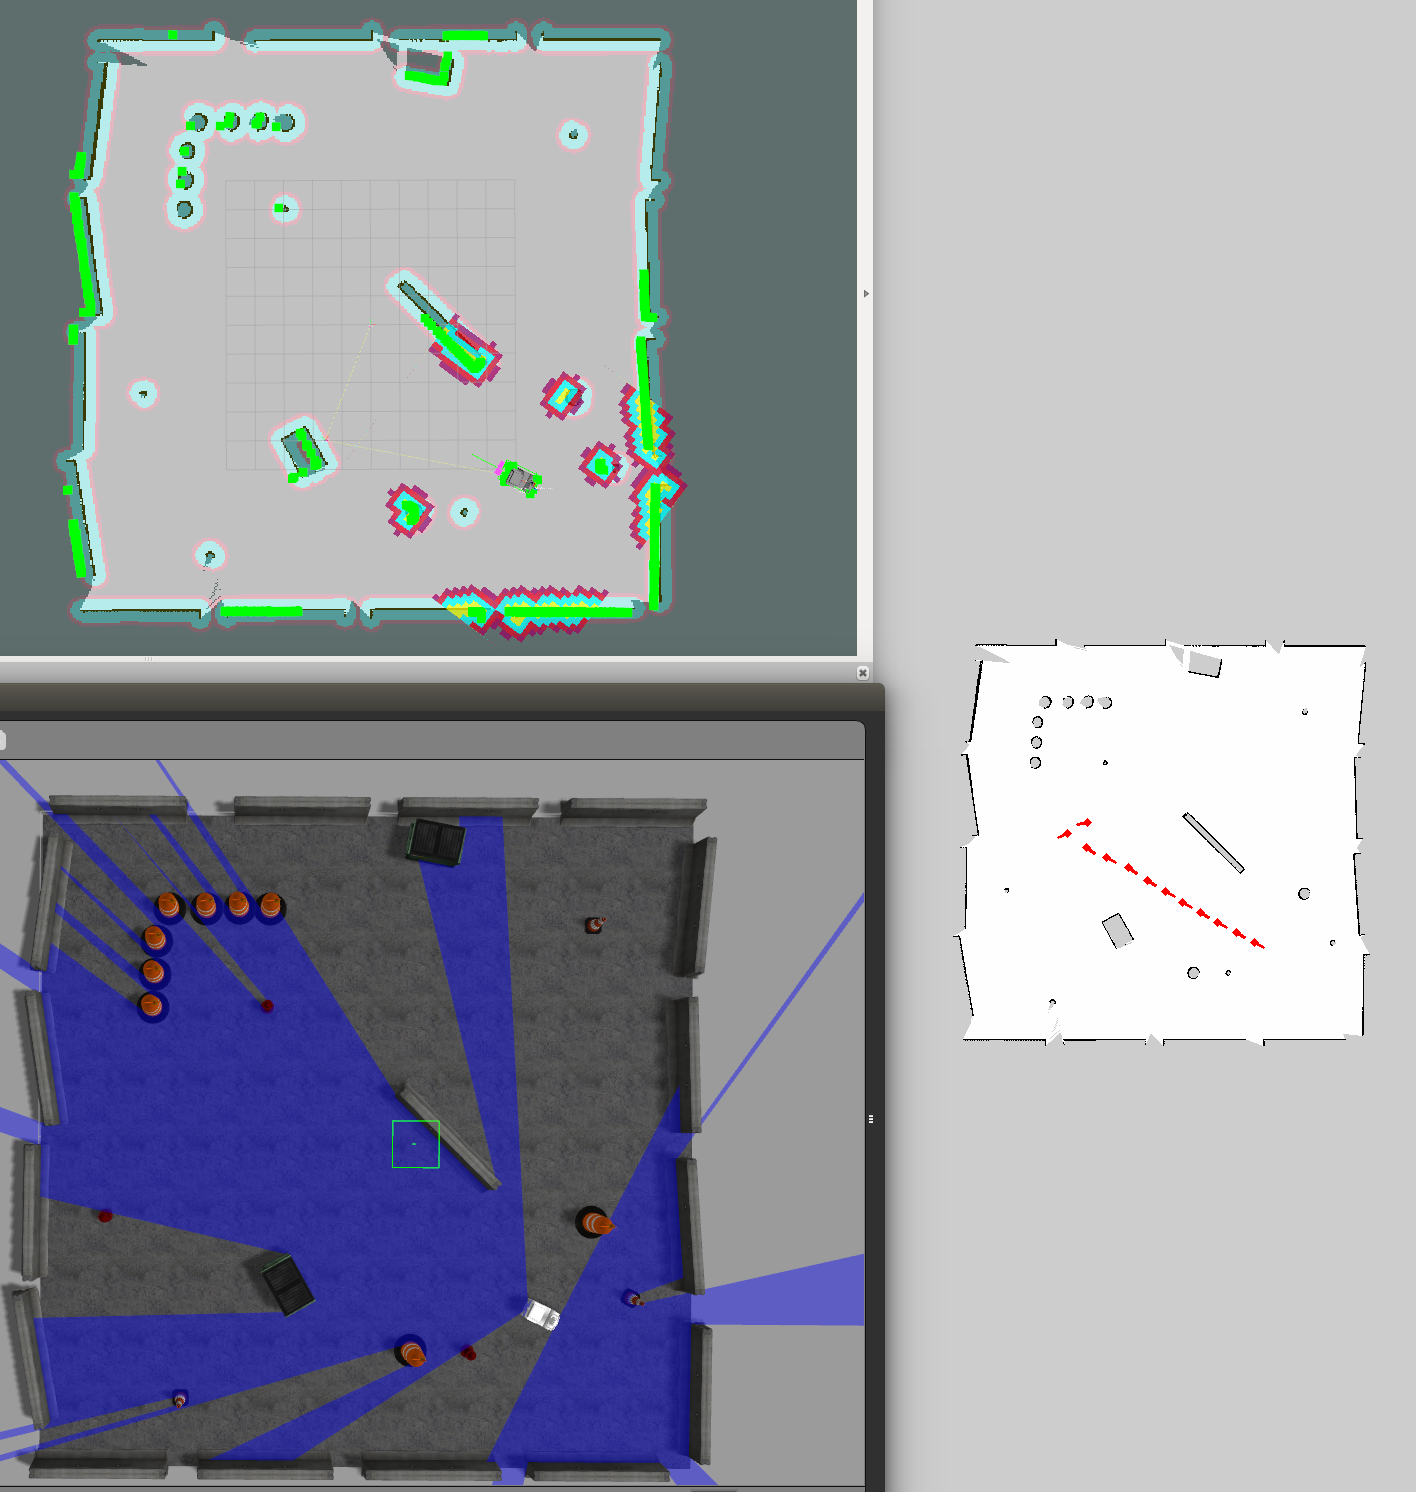
Remote monitoring package for navigation
Demo Video
下記のコマンドで上記動画のように遊べるはずです
$ roslaunch cirkit_unit03_navigation_gazebo autorun.launch
$ roslaunch remote_monitor remote_monitor_server.launch gazebo:=true map_yaml:=playpen_map.yaml
$ roslaunch remote_monitor remote_monitor_client.launch
Nodes
monitor_server
- 遠隔監視PC側
node.serviceで受信した位置と姿勢を地図上に表示させる
monitor_client
- 移動ロボット側
node.一定距離毎に現在位置と姿勢をserviceで送信する. - デフォルトでは
/amcl_poseをsubscribeする.
Installation
以下のコマンドにしたがってインストールしてください.
なお<catkin_ws>は,任意のcatkinizeされたワークスペースへのパスを表します.
$ cd <catkin_ws>/src
$ git clone https://github.com/CIR-KIT/remote_monitor.git
$ cd <catkin_ws>
$ wstool init src
$ wstool merge -t src src/remote_monitor/remote_monitor.rosinstall
$ wstool update -t src
$ rosdep update && rosdep install -r -y --from-paths src --ignore-src
$ catkin_make
$ source devel/setup.bash
How to launch
service server
- 地図の在処として,下記のパッケージ配下のフォルダを見に行きます.
- $(find cirkit_unit03_maps)/map/`
-
地図名は引数で指定して下さい.
- 実機の場合のコマンド
$ roslaunch remote_monitor remote_monitor_server.launch map_yaml:=hogehoge.yaml
-
Gazeboの場合のコマンド
$ roslaunch remote_monitor remote_monitor_server_gazebo.launch map_yaml:=hogehoge.yaml
service client
1. サーバー側のグローバルIPを設定する.
-
まずサーバ側の人にグローバルIPを聞く
-
以下の容量で設定ファイルに反映させる.
$ cd /etc/openvpn
$ emacs client.conf
# 省略

# グローバルIPアドレスを指定する.
remote 101.102.103.xxx 1194

# 省略
2. OpenVPNを再起動する.
$ service openvpn restart
3. ネットワークを確認する.
$ ifconfig
- 下記のような
tunデバイスが表示される.少し時間がかかる場合がある.
tun0      Link encap:不明なネット  ハードウェアアドレス 00-00-00-00-00-00-00-00-00-00-00-00-00-00-00-00
          inetアドレス:10.8.0.6  P-t-P:10.8.0.5  マスク:255.255.255.255
          UP POINTOPOINT RUNNING NOARP MULTICAST  MTU:1500  メトリック:1
          RXパケット:0 エラー:0 損失:0 オーバラン:0 フレーム:0
          TXパケット:12 エラー:0 損失:0 オーバラン:0 キャリア:0
          衝突(Collisions):0 TXキュー長:100
          RXバイト:2892 (2.8 KB)  TXバイト:504 (504.0 KB)
- そしてサーバにping
$ ping 10.8.0.1
4. ROSネットワークの設定
- 必ず全てのコンソールで下記の設定をすること.
export ROS_MASTER_URI=http://10.8.0.6:11311
export ROS_HOST_NAME=10.8.0.6
export ROS_IP=10.8.0.6
- 下記をsourceでもよい.
roscd remote_monitor/scripts
source vpn_setting_for_robot.sh
- 一応確認する.
$ env | grep ROS
5. ROSネットワークの確認
$ rosservice list
- 下記のサービスがあることを確認する.
/remote_monitor_robot_pose
/remote_monitor_human_pose
6. モニタークライアントを起動する
- 実機設定
$ roslaunch remote_monitor remote_monitor_client.launch
- Gazebo設定
$ roslaunch remote_monitor remote_monitor_client_gazebo.launch
parameters
-
/config/remote_monitor_server.yaml- ratio: 0.2
- 元画像ファイルを表示する際の初期縮小率。
- ratio: 0.2
-
/config/third_robot_client.yaml- interval_dist: 1.0
- 現在地を送る周期(距離[m]毎)
- pose_topic:
amcl_pose-subscribeするトピック名
- interval_dist: 1.0
command
- 地図画像をアクティブにした状態で下記キーを入力するとモードを切り替えられます。
-
c: current- 現在のロボットの位置のみを地図上に表示します。
-
h: history- 履歴を含んだロボットの位置を地図上に表示します。
-
r: reset history- history モードの履歴をクリアします。
-
p: plus to ratio- 地図を拡大します。historyモードの履歴は削除します。
-
m: minus to ratio- 地図を縮小します。historyモードの履歴は削除します。
CONTRIBUTING
No CONTRIBUTING.md found.
No version for distro hydro. Known supported distros are highlighted in the buttons above.
No version for distro kinetic. Known supported distros are highlighted in the buttons above.
No version for distro melodic. Known supported distros are highlighted in the buttons above.

